API
Screwdriver APIs and the data models around them are documented via Swagger. This prevents out-of-date documentation, enables clients to be auto-generated, and most importantly exposes a human-readable interface.
Version 4 is the current API, all links should be prefixed with
/v4.
Our API documentation can be found at api.screwdriver.cd/v4/documentation. To see yours, go to <API URL>/v4/documentation.
Using the API
With Swagger
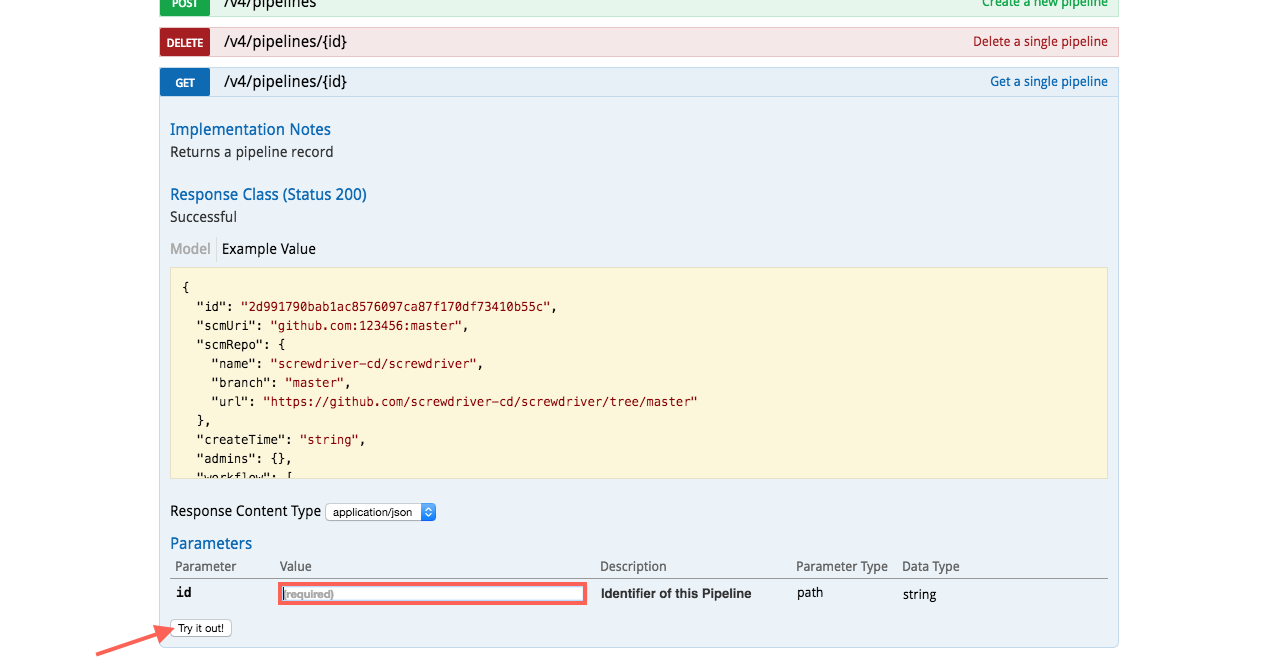
Swagger documentation includes examples and editable parameters to play around with. Visit the /v4/documentation page and use the interactive Try it out! buttons to make calls to our API.
Swagger page:
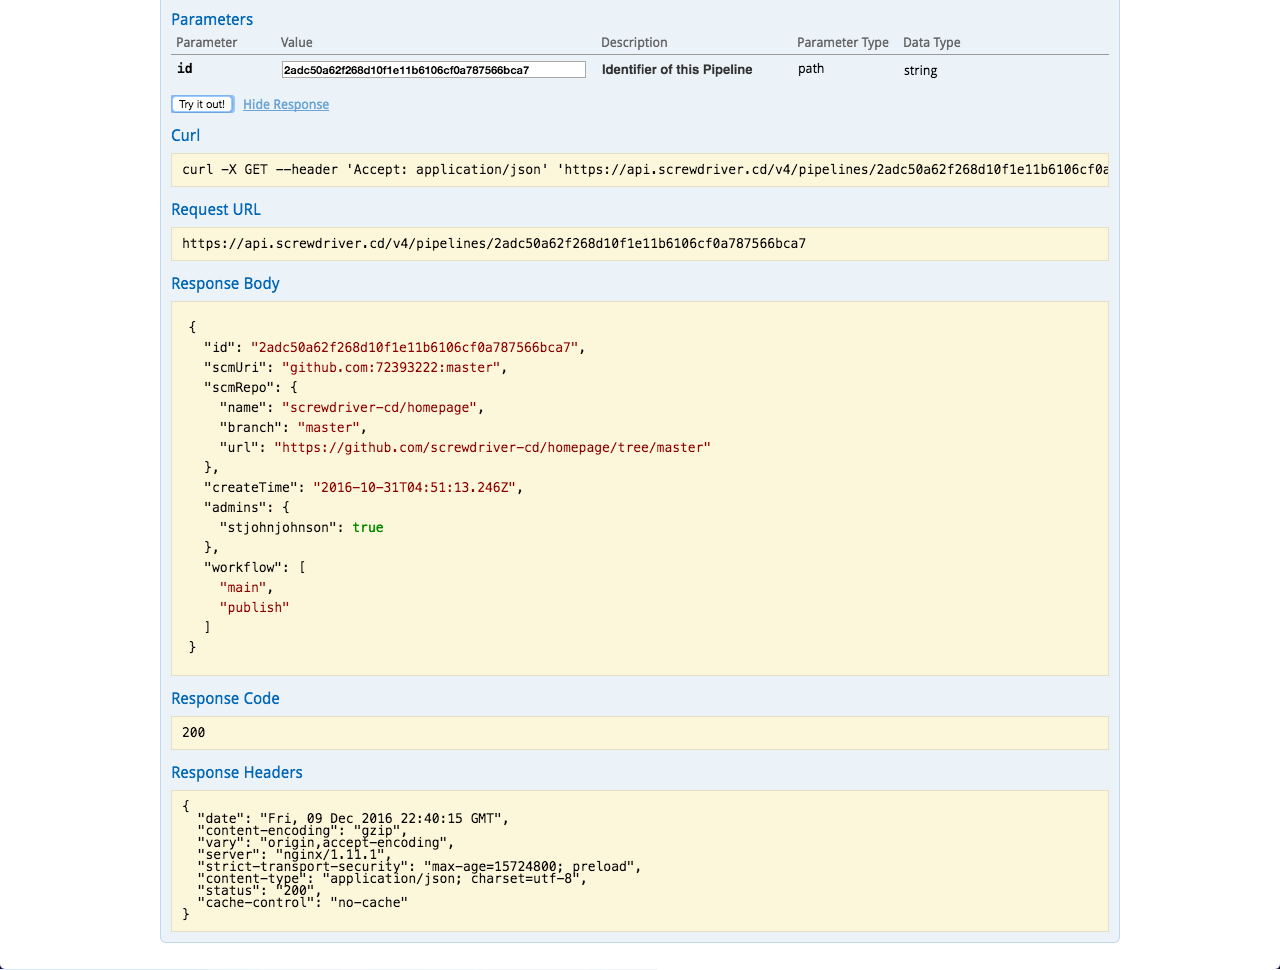
Response:
For more detailed documentation, click on the Model link.
Swagger model:

Get a Bearer Token
-
After login to Screwdriver UI, you can go to https://api.screwdriver.cd/v4/auth/token or your
<API URL>/v4/auth/tokento get a Bearer Token:
-
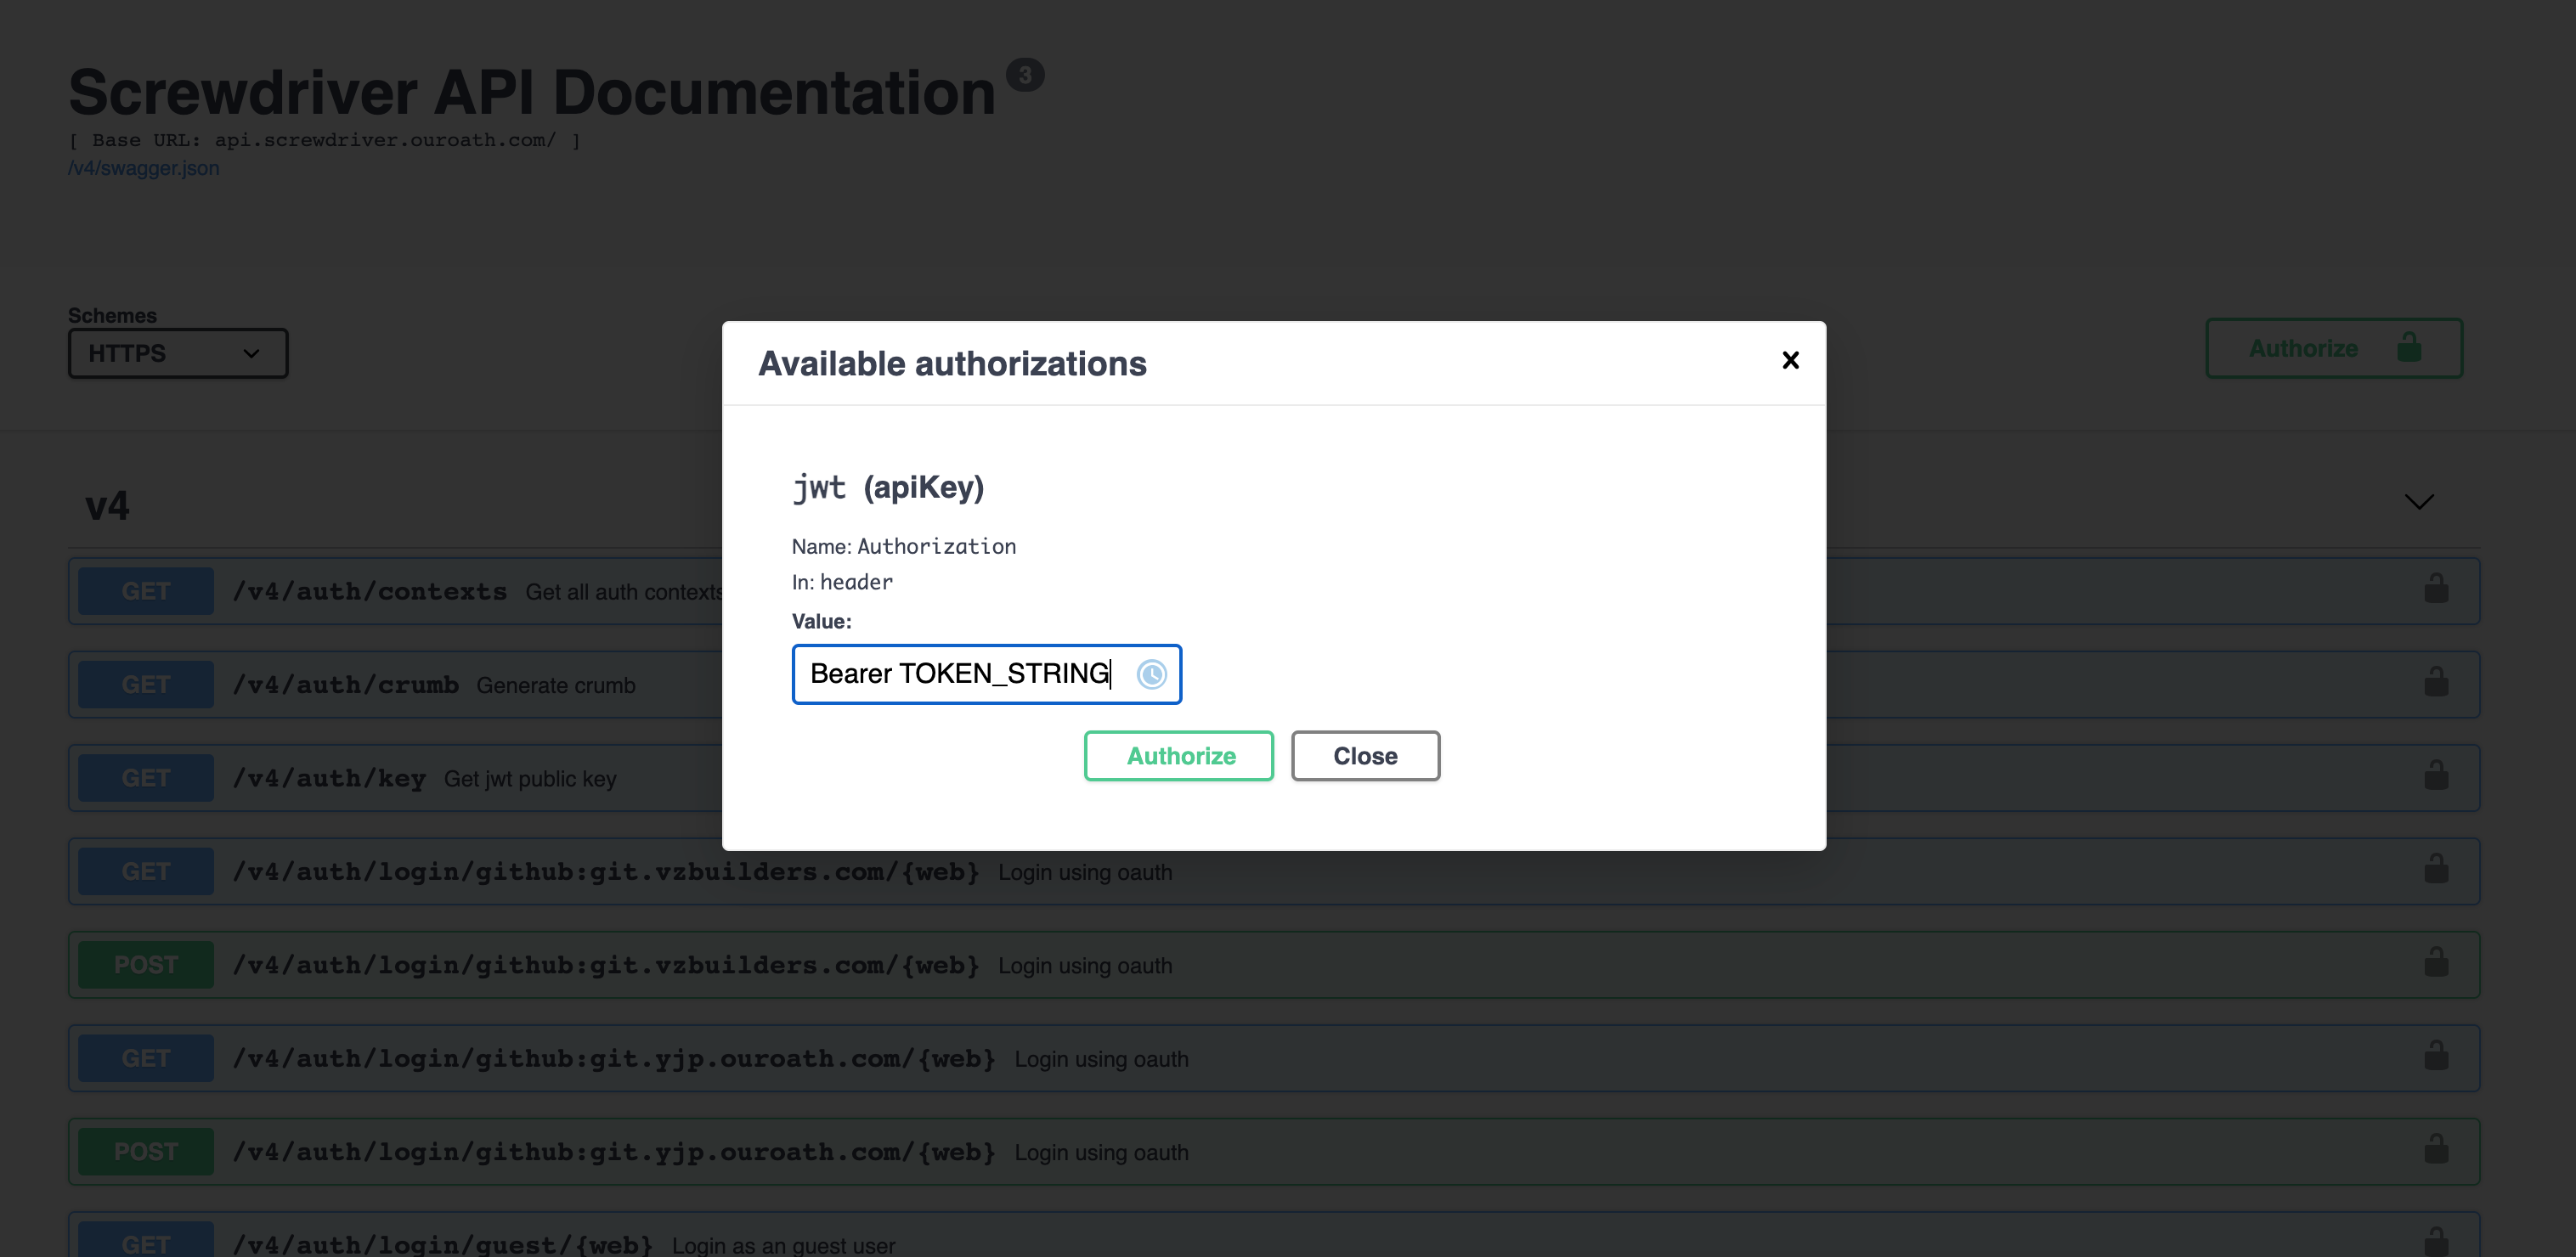
Now go back API documentation or yours
<API URL>/v4/documentation, click on the 🔒 icon to the enter the Bearer Token, like the following:
With a REST Client
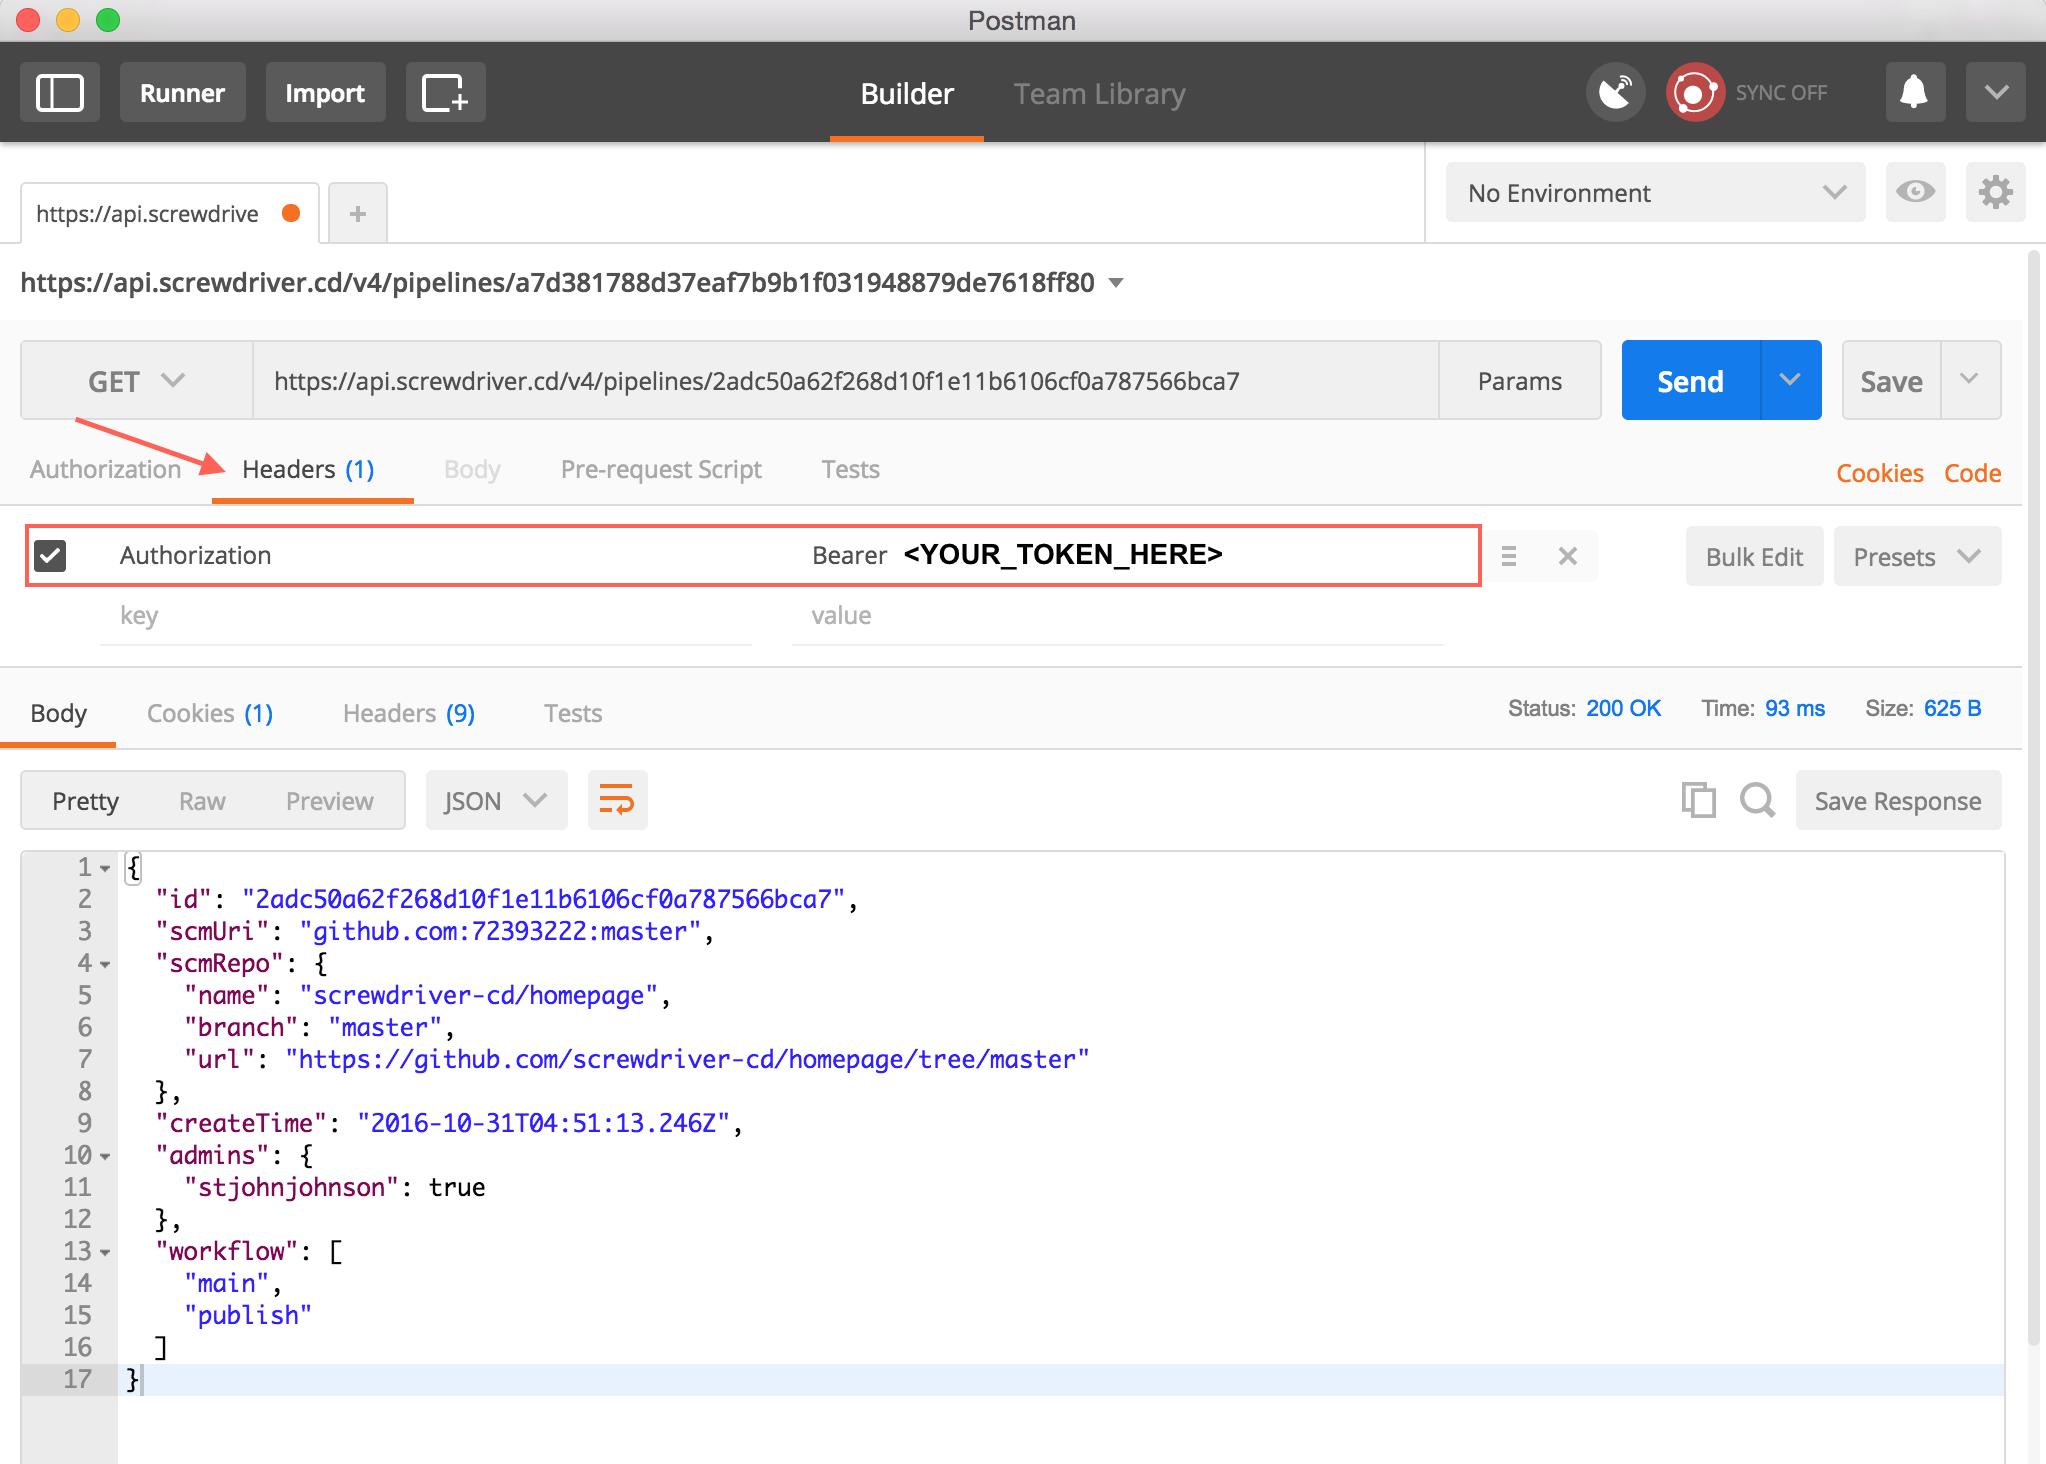
Use a REST client like Postman to make requests against the API. You will need an authorization token. To get an authorization token, login using /v4/auth/login and copy the token value when redirected to /v4/auth/token. See the Authorization and Authentication section for more information.
Requests can be made to the API with headers like below:
Content-Type: application/json
Authorization: Bearer <YOUR_TOKEN_HERE>
Example request:
With User or Pipeline tokens
For easy scripting with our API, we recommend using tokens.
Using Tokens to Authenticate
To authenticate with your newly created token, make a GET request to https://${API_URL}/v4/auth/token?api_token=${YOUR_TOKEN_VALUE}. This returns a JSON object with a token field. The value of this field will be a JSON Web Token, which you can use in an Authorization header to make further requests to the Screwdriver API. This JWT will be valid for 12 hours, after which you must re-authenticate.
Example: Starting a Pipeline
Here’s a short example written in Python showing how you can use an API token to start a pipeline. This script will directly call the Screwdriver API.
# Authenticate with token
auth_request = get('https://api.screwdriver.cd/v4/auth/token?api_token=%s' % environ['SD_KEY'])
jwt = auth_request.json()['token']

# Set headers
headers = { 'Authorization': 'Bearer %s' % jwt }

# Get the jobs in the pipeline
jobs_request = get('https://api.screwdriver.cd/v4/pipelines/%s/jobs' % pipeline_id, headers=headers)
jobId = jobs_request.json()[0]['id']

# Start the first job
start_request = post('https://api.screwdriver.cd/v4/builds', headers=headers, data=dict(jobId=jobId))
For more information and examples, check out our API documentation.
Authentication and Authorization
For Authentication we’re using JSON Web Tokens (JWTs) and Screwdriver API Tokens. JWTs need to be passed via
an Authorization header.
- To generate a JWT with OAuth, visit the
/v4/auth/loginendpoint, which will redirect you to the/v4/auth/tokenendpoint. - To generate a JWT with a Screwdriver API Token, make a
GETrequest to the/v4/auth/tokenendpoint with your API token as theapi_tokenquery parameter.
Authorization is handled by your SCM. Screwdriver uses SCM user tokens and identity to:
- identify what repositories you have read, write, and admin access to
- read allows you to view the pipeline
- write allows you to start or stop jobs
- admin allows you to create, edit, or delete pipelines
- read the repository’s
screwdriver.yaml - enumerate the list of pull-requests open on your repository
- update the pull-request with the success/failure of the build
- add/remove repository web-hooks so Screwdriver can be notified on changes
For more information, see the GitHub OAuth documentation.
Badges
To get an image that displays the current build statuses for a particular pipeline, you can use the URL <your_UI_URL>/pipelines/<your_pipelineId>/badge. To get it for job, you can use <your_UI_URL>/pipelines/<your_pipelineId>/<jobName>/badge.
For example, we display the badge above by using this code in Markdown. The status-image URL gives you the badge image and the status-url should be the link to your pipeline.
[![Pipeline Status][status-image]][status-url] [![Job Status][job-status-image]][status-url]

[status-image]: https://cd.screwdriver.cd/pipelines/1/badge
[job-status-image]: https://cd.screwdriver.cd/pipelines/1/main/badge
[status-url]: https://cd.screwdriver.cd/pipelines/1
Design
Our API was designed with three principles in mind:
- All interactions of user’s data should be done through the API, so that there is a consistent interface across the tools (CLI, Web UI, etc.).
- Resources should be REST-ful and operations should be atomic so that intent is clear and human readable.
- API should be versioned and self-documented, so that client code generation is possible.
Payload Limitation
The API enforces a maximum payload size of 1 MB per request. This limitation is due to constraints imposed by the Hapi framework on which our API server is built. Requests exceeding this size will be rejected, so please design your API interactions accordingly.
Make Your Own
If you’d like to make your own Swagger documentation, check out our JSON for reference at https://api.screwdriver.cd/v4/openapi.json. To see your Swagger.json, visit /v4/openapi.json.